ELK-Logstash日志收集
阅读 (16821)ES负责存储、分析数据,但是这一切前提是需要有数据,ES本身是不能够收集数据的,数据的收集如何来做呢?我们可以通过两个软件来实现数据的收集,那就是:
Logstash:收集、处理数据然后交给ES
Beats:收集数据交给ES
两者不同点在于Logstash能够更像一个数据中转站,它能够收集数据,并且对收集的数据进行处理,所以logstash消耗的计算机资源也是比较大的。Beats只负责收集数据,将数据收集后交给ES,和logstash相比其消耗的计算机资源更少,可以忽略。
一、logstash介绍
logstash是一个开源的数据采集工具,通过数据源采集数据.然后进行过滤,并自定义格式输出到目的地。
数据分为:
- 结构化数据 如:mysql数据库里的表等
- 半结构化数据 如: xml,yaml,json等
- 非结构化数据 如:文档,图片,音频,视频等
logstash可以采集任何格式的数据,当然我们这里主要是讨论采集系统日志,服务日志等日志类型数据。
官方产品介绍:https://www.elastic.co/cn/products/logstash

input插件: 用于导入日志源 (配置必须)
https://www.elastic.co/guide/en/logstash/current/input-plugins.html
filter插件: 用于过滤(不是配置必须的)
https://www.elastic.co/guide/en/logstash/current/filter-plugins.html
output插件: 用于导出(配置必须)
https://www.elastic.co/guide/en/logstash/current/output-plugins.html
二、logstash安装部署
a、安装前准备
机器准备:node3
- 静态IP(要求能上公网,最好用虚拟机的NAT网络类型上网)
- 主机名及主机名绑定
- 关闭防火墙和selinux
- 时间同步
- yum源(centos安装完系统后的默认yum源就OK)
安装前准备参考https://www.zutuanxue.com/home/4/52_138
本文通过自定义脚本init_linux_os.sh脚本来完成

# cat init_linux_os.sh
#!/bin/bash
#Description: initialize linux OS from ZUTUANXUE(http://www.zutuanxue.com)
#Release: 1.0
#Auther: www.zutuanxue.com
#Email:
#OS: Centos 8.X
################
hosts() {
        echo "" > /etc/hosts
        cat >> /etc/hosts<<EOF
127.0.0.1   localhost
::1         localhost
192.168.98.200  manage01
192.168.98.201  node1
192.168.98.202  node2
192.168.98.203  node3
192.168.98.204  node4
EOF
}


################
cat <<EOF
#Description: initialize linux OS from ZUTUANXUE(http://www.zutuanxue.com)
#Release: 1.0
#Auther: www.zutuanxue.com
#Email:
#OS: Centos 8.X

#1、disable firewall
#2、disable selinux
#3、set chrony client
EOF


#
hosts

#disable fireall
systemctl disable firewalld
systemctl stop firewalld
iptables -F
iptables -t nat -F


#disable selinux
sed -i -r '/SELINUX=/c\SELINUX=disabled' /etc/selinux/config

#set chrony client
sed -i.bak '/^pool 2.centos.pool.ntp.org iburst$/s//#/' /etc/chrony.conf
cat >> /etc/chrony.conf <<EOF
server ntp1.aliyun.com
server ntp2.aliyun.com
server ntp3.aliyun.com
server ntp4.aliyun.com
EOF

if systemctl restart chronyd.service;then
       echo -e "\033[32m SUCCESS \033[0m"
else
       echo -e "\033[31m FAIL \033[0m"
       exit 1
fi
b、安装部署
因为logstash也是基于java开发的,所以安装之前先要解决运行环境问题,需要安装jdk.
1) 安装jdk
2) 安装logstash
安装jdk-13.0.2
参考5.2.1
本文通过自定义脚本elk_install.sh安装
[root@node3 es_install]# sh elk_install.sh jdk
警告:jdk-13.0.2_linux-x64_bin.rpm: 头V3 RSA/SHA256 Signature, 密钥 ID ec551f03: NOKEY
jdk-13.0.2 install success
安装logstash
安装方法:
- yum
- rpm
- 源码
我依然采用rpm安装,如果安装ES的时候设置过yum源,可以直接使用命令:
yum -y install logstash
[root@node3 ~]# rpm -i logstash-7.6.0.rpm
警告:logstash-7.6.0.rpm: 头V4 RSA/SHA512 Signature, 密钥 ID d88e42b4: NOKEY
Using provided startup.options file: /etc/logstash/startup.options
Java HotSpot(TM) 64-Bit Server VM warning: Option UseConcMarkSweepGC was deprecated in version 9.0 and will likely be removed in a future release.
Java HotSpot(TM) 64-Bit Server VM warning: Options -Xverify:none and -noverify were deprecated in JDK 13 and will likely be removed in a future release.
WARNING: An illegal reflective access operation has occurred
WARNING: Illegal reflective access by com.headius.backport9.modules.Modules to method sun.nio.ch.NativeThread.signal(long)
WARNING: Please consider reporting this to the maintainers of com.headius.backport9.modules.Modules
WARNING: Use --illegal-access=warn to enable warnings of further illegal reflective access operations
WARNING: All illegal access operations will be denied in a future release
/usr/share/logstash/vendor/bundle/jruby/2.5.0/gems/pleaserun-0.0.30/lib/pleaserun/platform/base.rb:112: warning: constant ::Fixnum is deprecated
Successfully created system startup script for Logstash
c、目录及文件
安装目录:/usr/share/logstash
配置文件目录: /etc/logstash/
[root@node3 logstash]# tree
.
├── conf.d					#业务配置文件,空目录 *.conf 从哪里采集日志,送到哪里去
├── jvm.options
├── log4j2.properties
├── logstash-sample.conf	#数据收集模板文件
├── logstash.yml				#配置文件
├── pipelines.yml
└── startup.options			#启动参数

1 directory, 6 files
d、启动管理
开机启动
[root@node3 logstash]# systemctl enable logstash
Created symlink /etc/systemd/system/multi-user.target.wants/logstash.service → /etc/systemd/system/logstash.service.
启动服务
[root@node3 logstash]# systemctl start logstash

注意第一次安装未配置是无法启动的,应为没有业务配置文件在conf.d下面
命令行启动验证
[root@node3 logstash]# /usr/share/logstash/bin/logstash -e 'input {stdin {}} output {stdout {}}'

#自己输给自己
运行在前台,ctrl+C终止
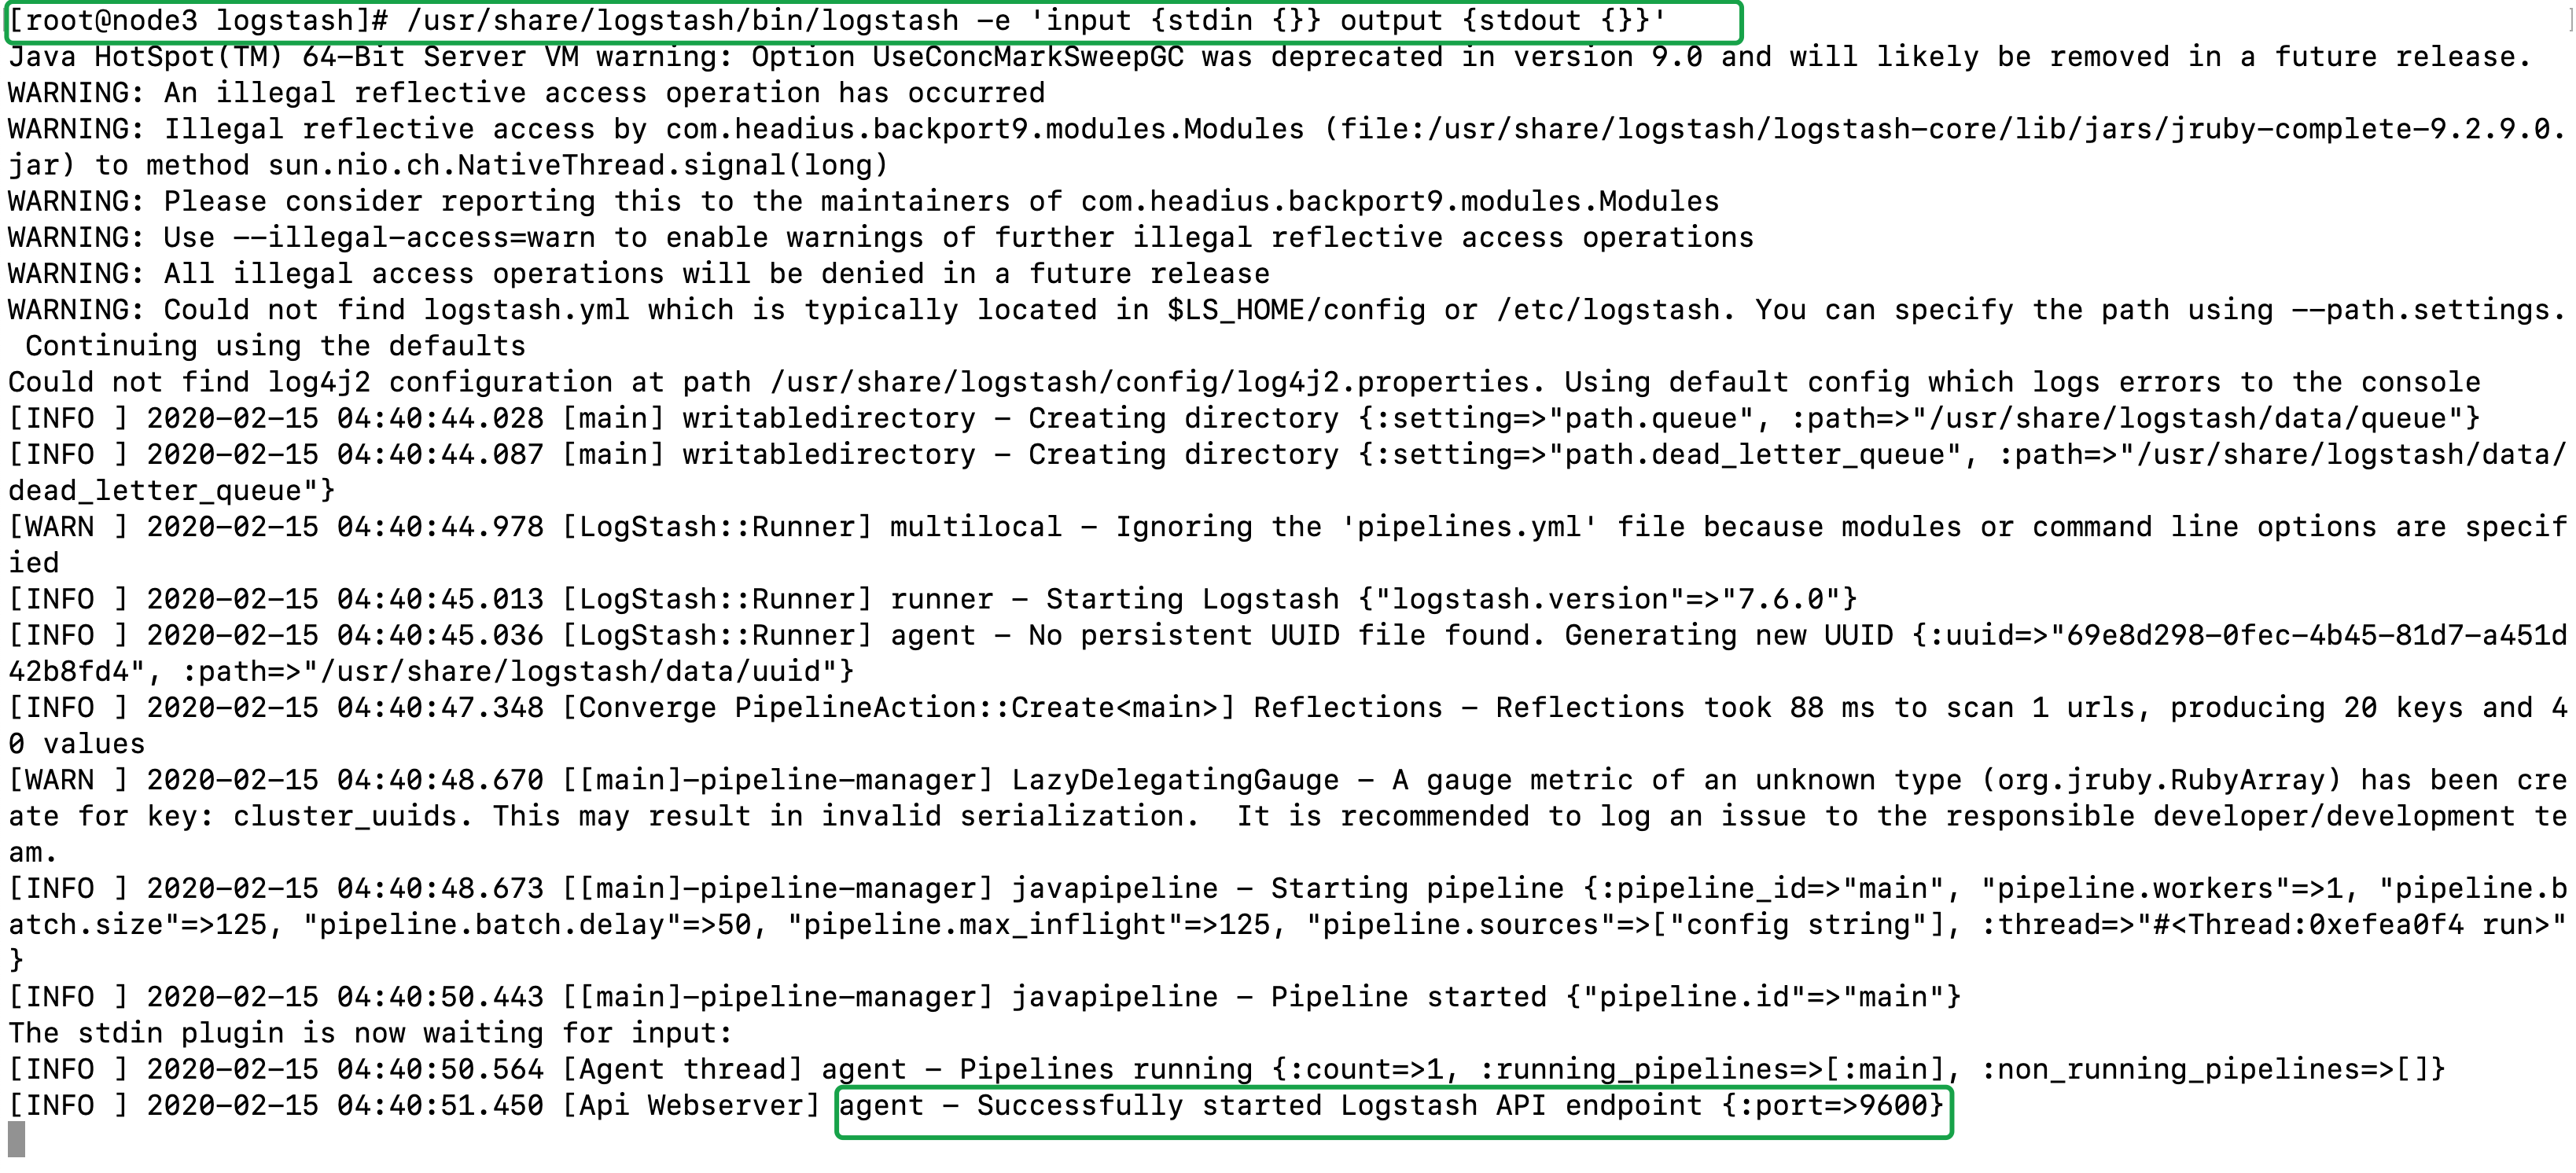
如图,看到启动成功就可以了
e、查看启动
启动成功后可以查看一下logstash启动情况,使用netstat命令。
[root@node3 logstash]# netstat -ntpl

三、配置logstash服务监听地址为本机网卡IP
[root@node3 ~]# vim /etc/logstash/logstash.yml
# ------------ Metrics Settings --------------
#
# Bind address for the metrics REST endpoint
#
http.host: "0.0.0.0"     #删除#号,输入本机网卡地址或0.0.0.0,顶格写
#
# Bind port for the metrics REST endpoint, this option also accept a range
# (9600-9700) and logstash will pick up the first available ports.
#
# http.port: 9600-9700
配置业务后启动查看
四、收集本机messages日志给ES
业务架构
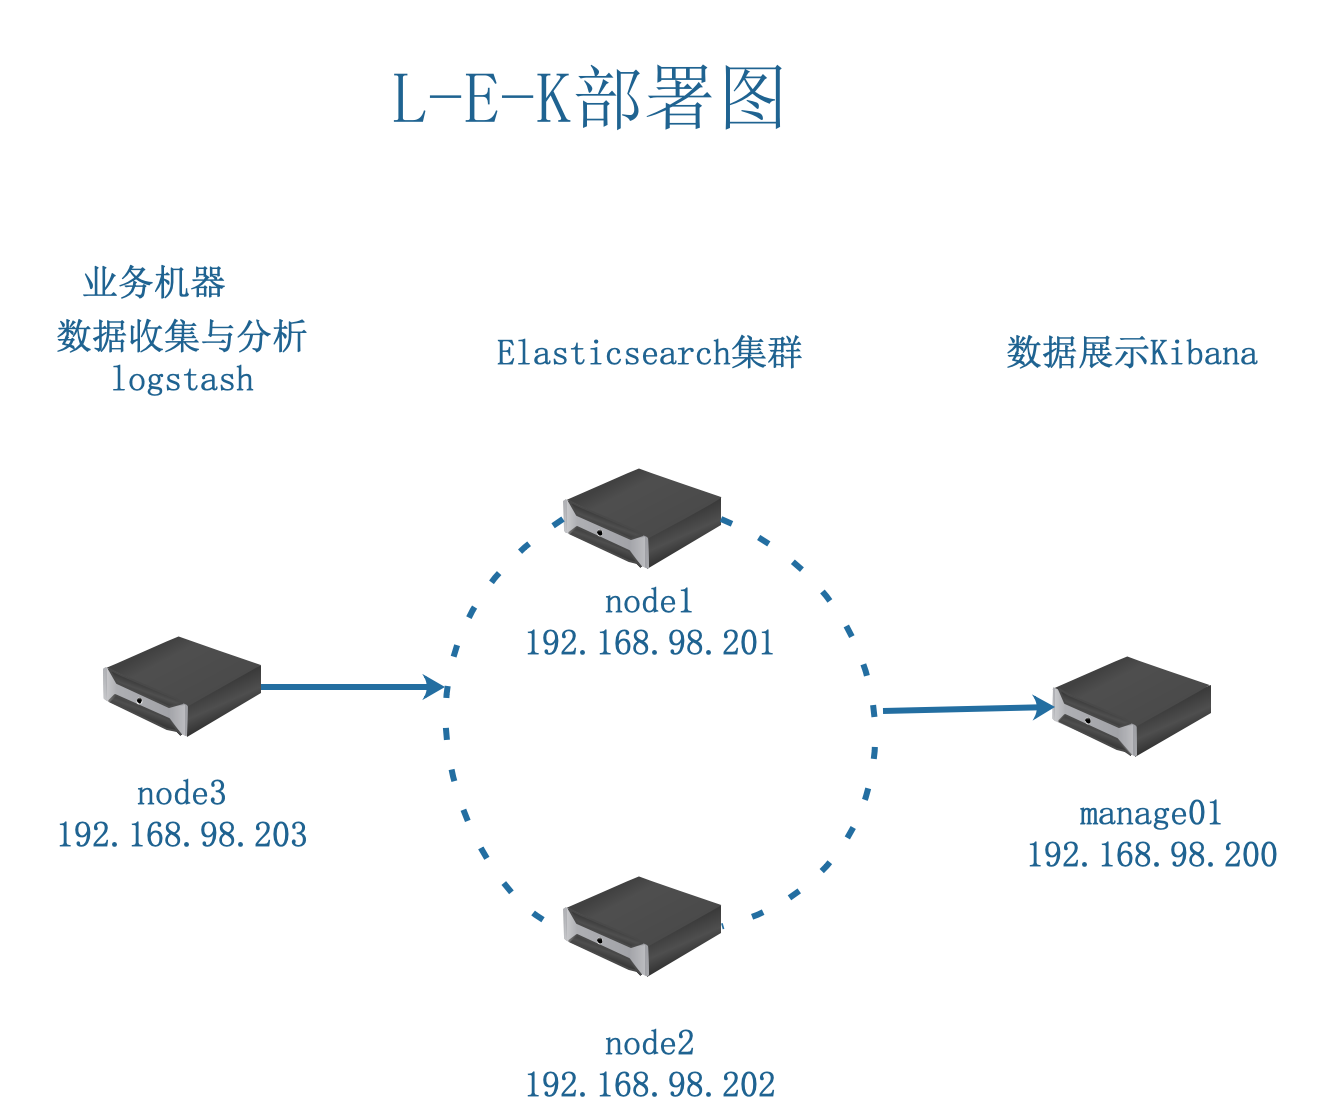
这里以/var/log/messages为例,只定义input输入和output输出,不考虑过滤
配置业务文件存储在conf.d下
[root@node3 logstash]# cat /etc/logstash/conf.d/logstash_to_es_messages.conf
#采集日志位置
input {
    file {
        path => "/var/log/messages"				#日志文件路径
        start_position => "beginning"			#收集日志开始的位置点
    }
}

#输出给ES
output {
    elasticsearch{
        hosts => ["192.168.98.201:9200"] #ES地址
        #数据保存的索引名字    test-YYYY-MM-DD  按日期生成索引
        index => "test-%{+YYYY.MM.dd}"
    }

#输出到屏幕一份,dubug使用,前台启动Logstash排错有用
#stdout {
#	      codec => rubydebug
#    }
}
注意问题
设置/var/log/messages文件权限,让logstash能读取
logstash进程管理用户 logstash
/var/log/messages文件权限400
[root@node3 logstash]# ls /var/log/messages -l
-rw------- 1 root root 374743 2月  15 05:08 /var/log/messages
[root@node3 logstash]# chmod 644 /var/log/messages
启动logstash生效设置
[root@node3 logstash]# systemctl restart logstash
查看启动日志
[root@node3 ~]# tail -f /var/log/logstash/logstash-plain.log

看到上图选择的内容就说明成功了。
验证监听地址
[root@node3 ~]# netstat -ntpl

验证ES数据,通过ES-head查看数据情况
通过浏览器登陆:http://192.168.98.201:9100
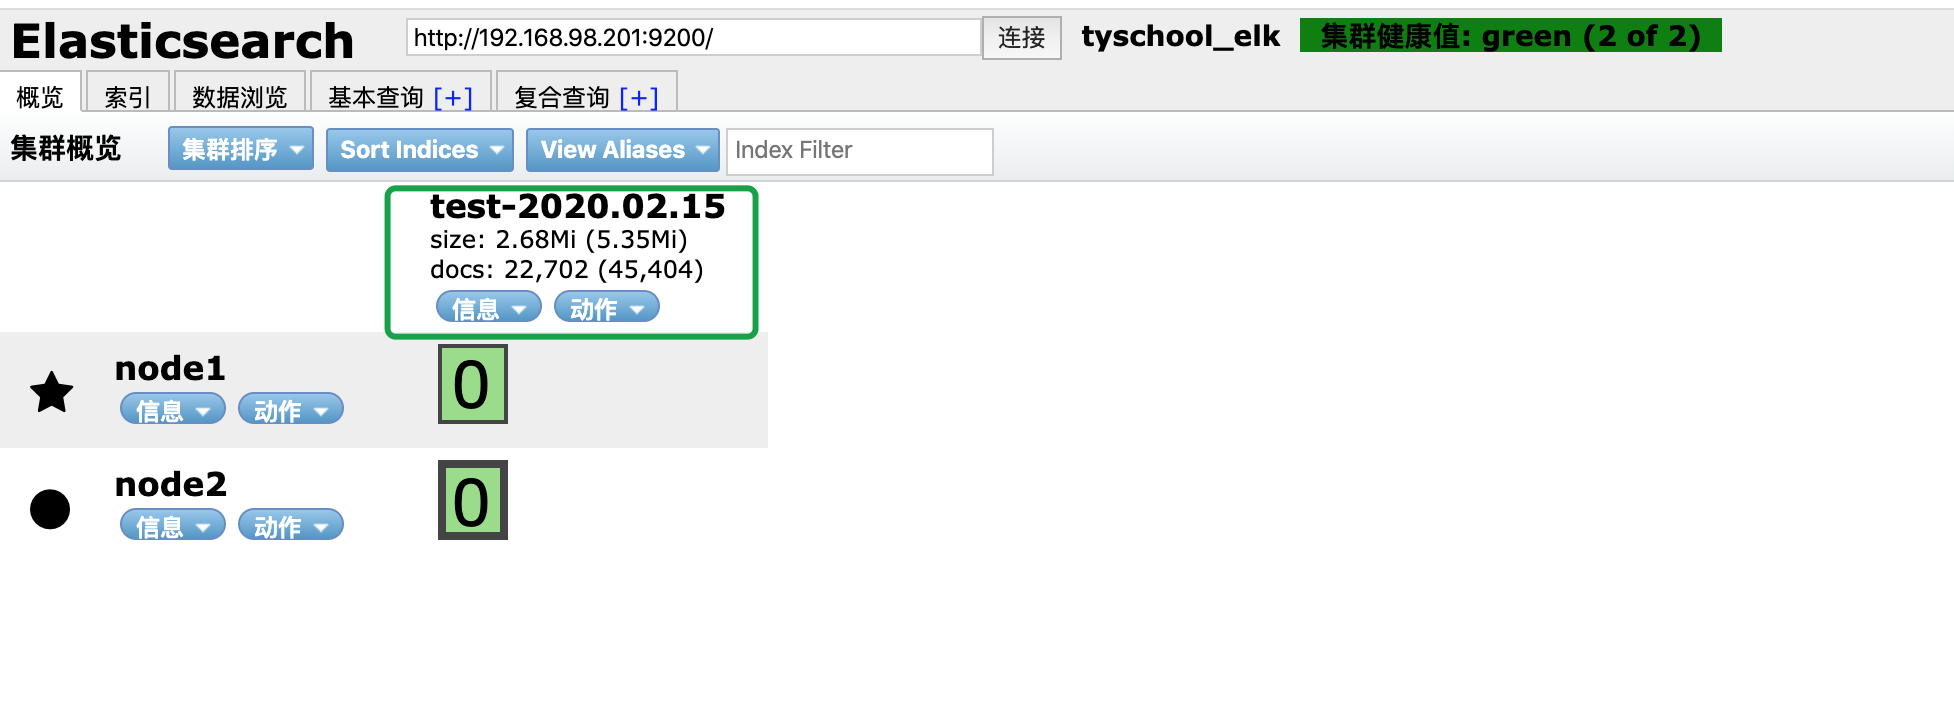
看到数据索引,成功了。
五、logstash多日志收集
实验注意: 清除上一个收集Messages的业务配置文件
清除ES的索引,方便查看,此条不是必须
**案例:**实验日志文件收集
/var/log/messages 索引 message-%{+YYYY.MM.dd}
/var/log/dnf.rpm.log 索引 dnf-%{+YYYY.MM.dd}
思路
1、(input)收集日志同时给不同的日志打标签区别
2、(output)根据不同的数据标签将不同数据输出到ES不同索引
[root@node3 ~]# cat /etc/logstash/conf.d/logstash_to_es_mutl_log.conf
input {
    file {
        path => "/var/log/messages"
        start_position => "beginning"
	      type => "messages"   #给每条数据打标签
    }


   file {
			path => "/var/log/dnf.rpm.log"
			start_position => "beginning"
			type => "dnf"
  }
}

output {

   if [type] == "messages" {
	elasticsearch {
        	hosts => ["192.168.98.201:9200"]
		index => "message-%{+YYYY.MM.dd}"
	  }
   }

   if [type] == "dnf" {
	elasticsearch {
        	hosts => ["192.168.98.201:9200"]
		index => "dnf-%{+YYYY.MM.dd}"
	}
  }

}
重启logstash验证ES数据
[root@node3 logstash]# systemctl restart logstash
查看ES-head web页面概览标签,查看数据索引
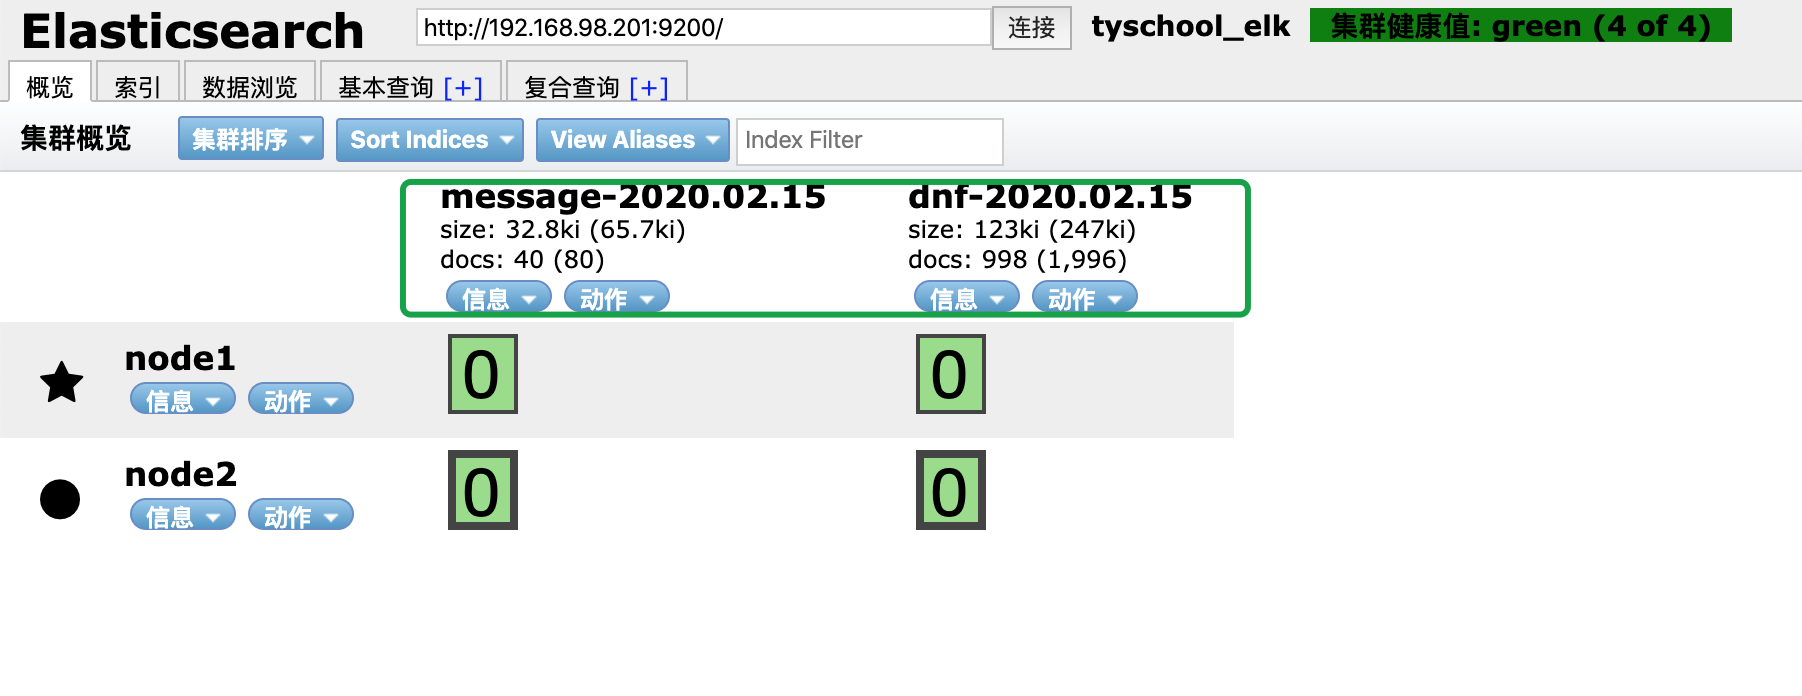
通过数据浏览标签,查看原始数据我们自定义的标签。
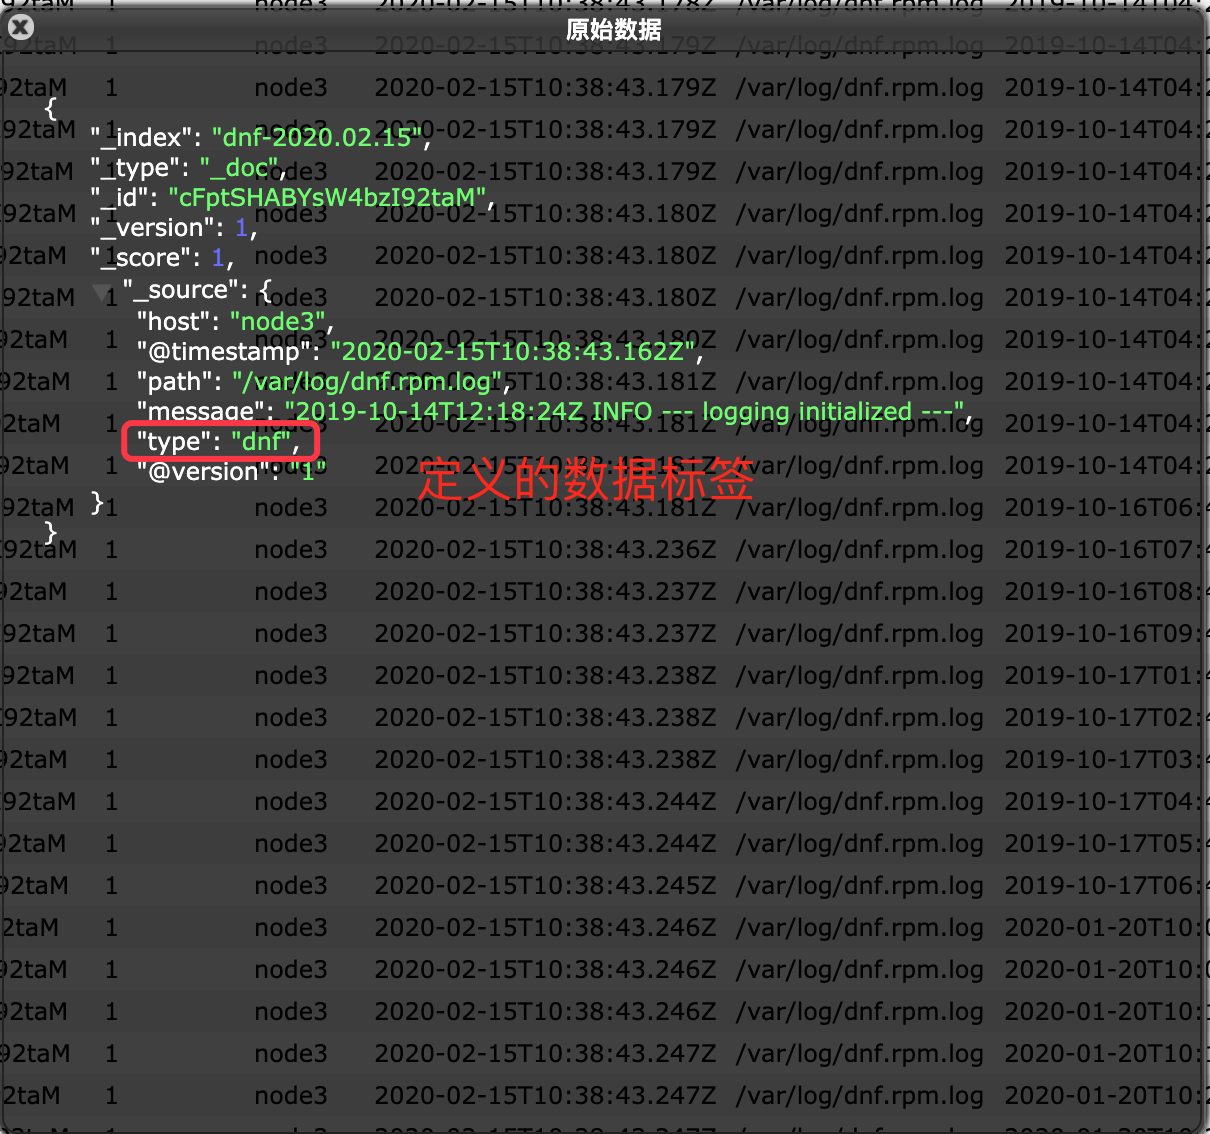
完美,多日志收集成功。

